Skip to content
HT-Logo
  • DNS
    • All Records
    • DNS Lookup
    • DNS Reverse
    • DNS Servers
    • MTA-STS
  • Domain
    • ARIN Lookup
    • ASN Lookup
  • Email
    • BIMI Lookup
    • Blacklist Check
    • DKIM Lookup
    • DMARC Lookup
    • Email Deliverability
  • Network
    • IP Lookup
    • Ping Test
    • TCP Lookup
  • Registrar
    • Domain Expiry Check
    • Domain Health
    • Domain Info
    • Domain Lookup
    • WHOIS
  • SMTP
    • Service Lookup
    • SMTP Test
  • Web
    • HTTP Lookup
    • HTTPS Lookup
    • My IP address
  • All Tools
  • Pricing
  • Blog
  • Contact
Login

Day: November 20, 2025

  • Posted on November 20, 2025
  • In DNS, Web Development

8.8.4.4 – Google Secondary DNS Explained: Everything You Need to Know

8.8.4.4 Google Secondary DNS

When it comes to DNS servers, most people are familiar with 8.8.8.8, Google’s primary public DNS server. But did you know that Google also provides a secondary DNS server, 8.8.4.4, to ensure redundancy, reliability, and faster internet connectivity?

In this guide, we’ll explain what 8.8.4.4 is, why it’s important, how to configure it on your devices, and how it can improve your browsing experience.

What is 8.8.4.4?

8.8.4.4 is Google’s secondary public DNS server. DNS (Domain Name System) translates human-readable domain names, like www.example.com, into IP addresses that computers can understand. While 8.8.8.8 serves as the primary resolver, 8.8.4.4 acts as a backup, ensuring uninterrupted service if the primary server is unavailable.

Key Points:

  • Part of Google Public DNS (launched in 2009)
  • Free and globally accessible
  • Provides redundancy and reliability
  • Helps prevent DNS-related errors and downtime

Why Use 8.8.4.4?

1. Redundancy

Even the most reliable DNS servers can experience outages or temporary connectivity issues. Using 8.8.4.4 as a secondary ensures that your internet queries continue without interruption if 8.8.8.8 fails.

2. Reliability and Speed

Google’s DNS network is globally distributed, providing fast query responses and minimizing delays in page loading. By pairing 8.8.4.4 with 8.8.8.8, you maximize uptime and reliability.

3. Security

Google Public DNS, including 8.8.4.4, protects against common DNS attacks like cache poisoning and spoofing, helping to keep your browsing safe.

4. Easy Troubleshooting

8.8.4.4 can be used to test network or DNS issues. If your primary DNS fails, the secondary will still respond, helping you identify connectivity problems faster.

How to Configure 8.8.4.4

You can set 8.8.4.4 as your secondary DNS on various devices, including Windows, macOS, Linux, routers, and mobile phones.

Windows Setup

  1. Open Network & Internet Settings → Change Adapter Options
  2. Right-click your connection → Properties
  3. Select IPv4 → Properties
  4. Check Use the following DNS server addresses
  5. Enter:
    • Preferred DNS: 8.8.8.8
    • Alternate DNS: 8.8.4.4
  6. Click OK and restart your connection

macOS Setup

  1. Go to System Preferences → Network → Advanced → DNS
  2. Click + and enter 8.8.8.8
  3. Click + again and enter 8.8.4.4
  4. Apply changes

Mobile Devices

  • iOS: Wi-Fi → Tap network → Configure DNS → Manual → Add 8.8.8.8 and 8.8.4.4
  • Android: Wi-Fi → Modify Network → Advanced → IP Settings → Static → DNS 1 & 2

8.8.4.4 vs 8.8.8.8

Server Role Notes
8.8.8.8 Primary DNS Handles main queries
8.8.4.4 Secondary DNS Backup if primary fails

Verdict: Always use both for fast, reliable, and resilient DNS resolution.

Testing 8.8.4.4

1. Ping Test

Open Command Prompt / Terminal and run:

ping 8.8.4.4
  • If you get responses → server reachable
  • If it fails → network/DNS problem
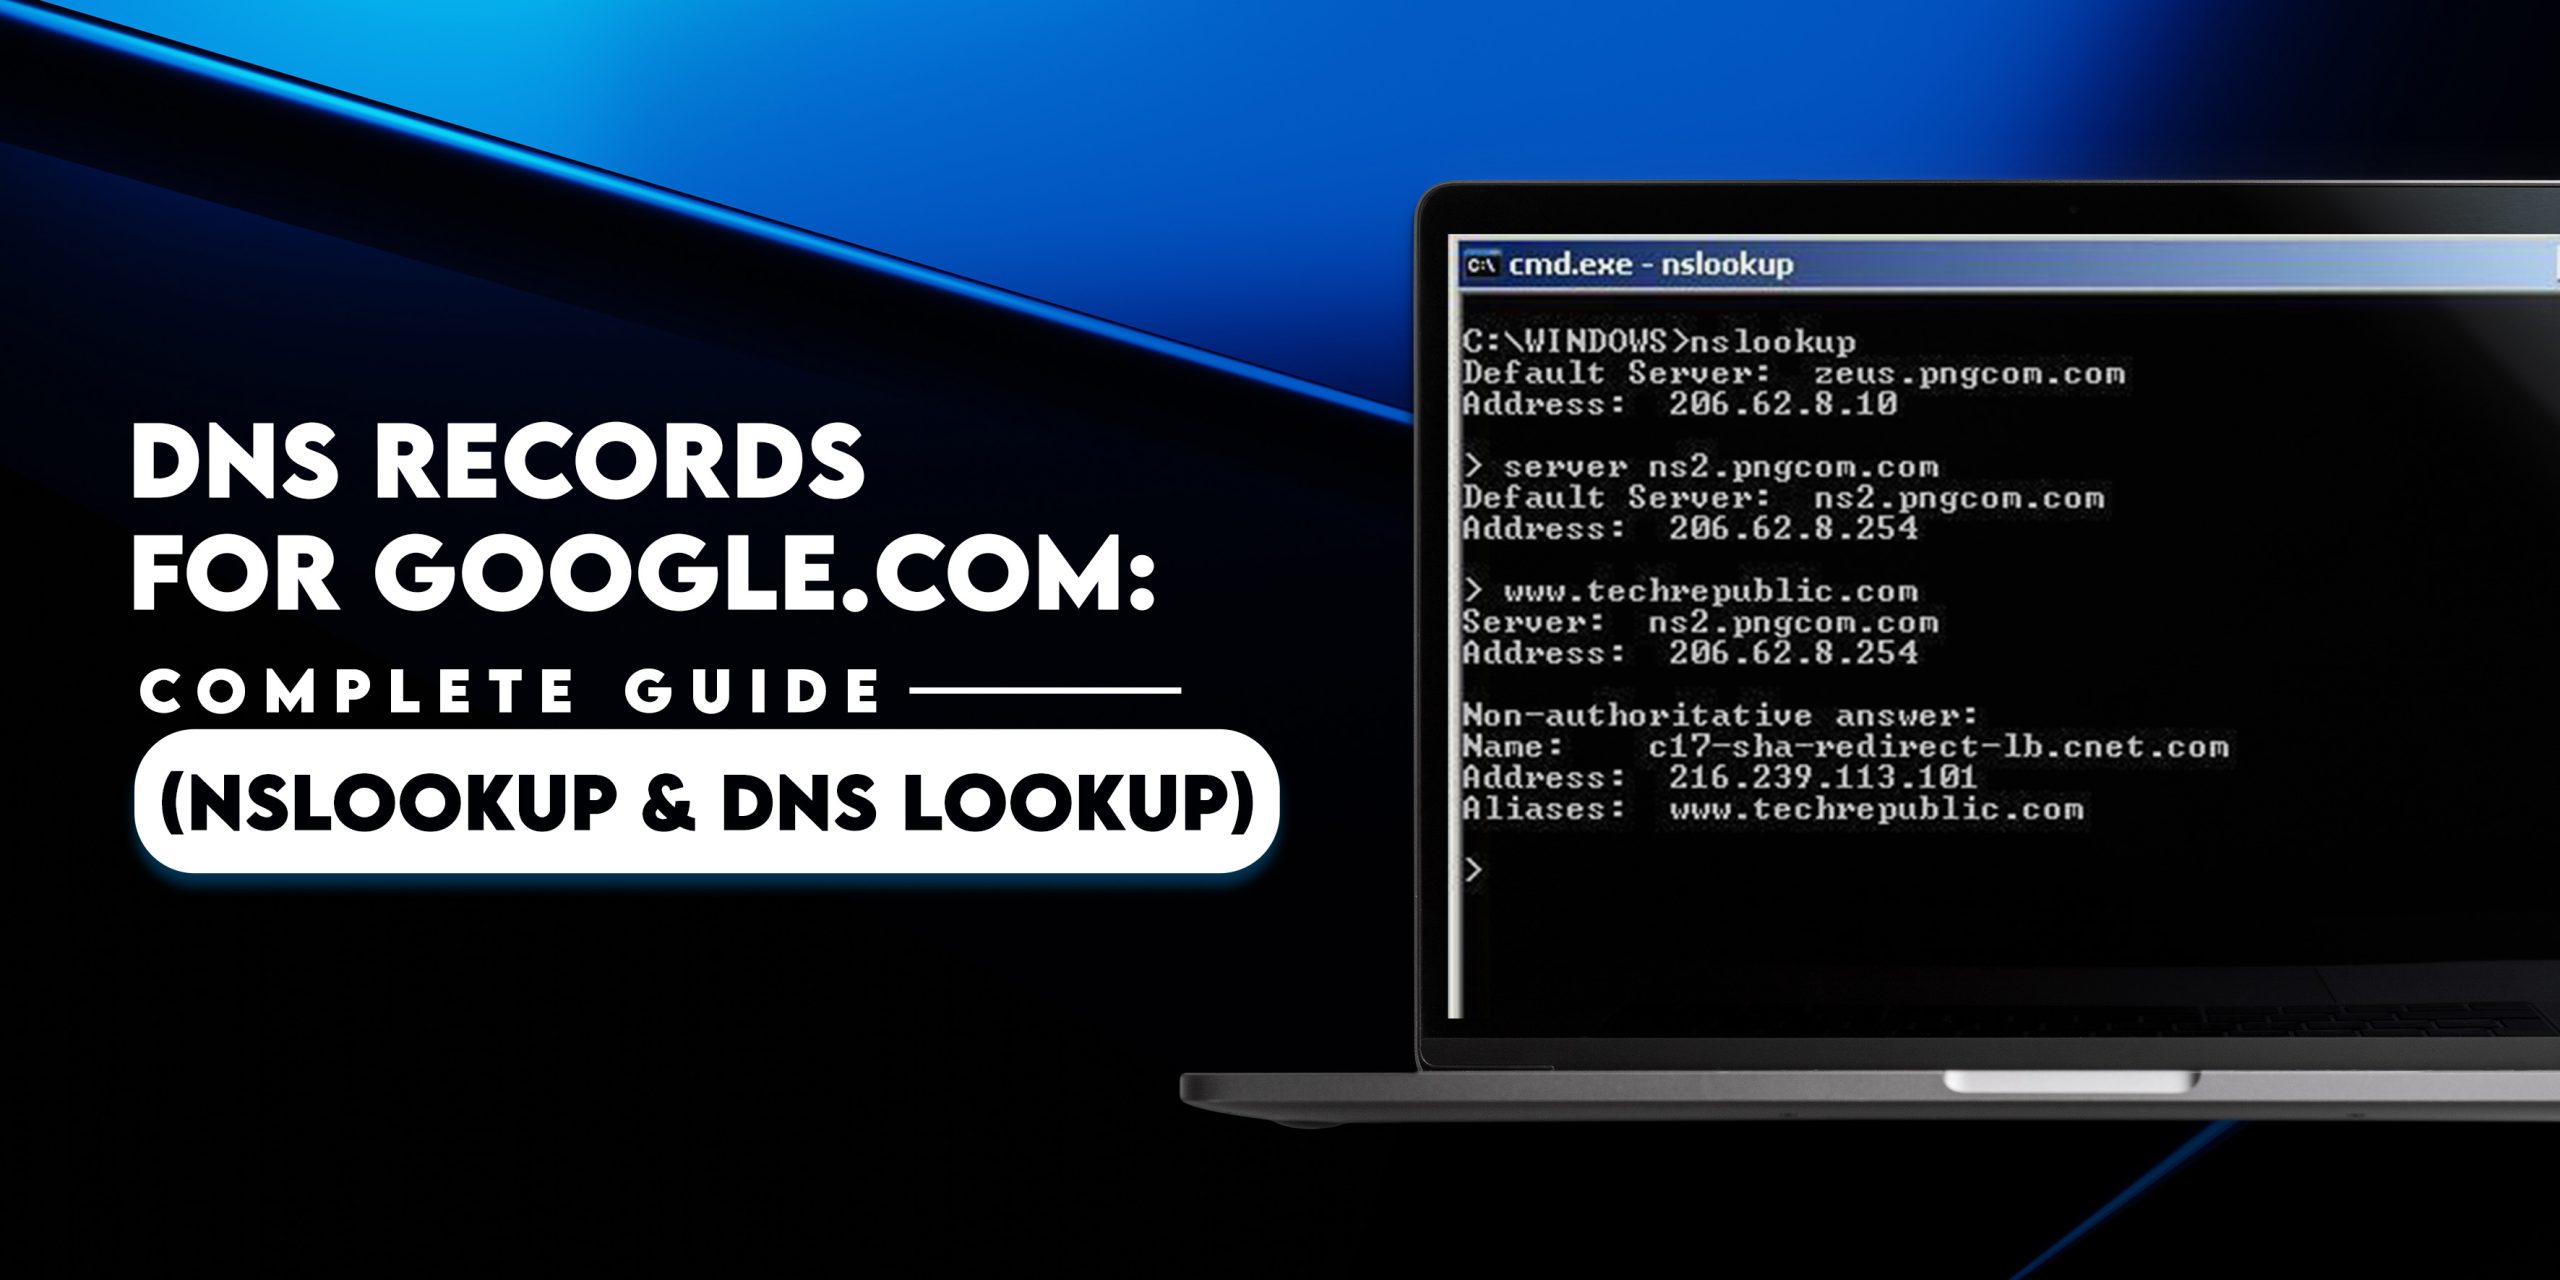
2. DNS Lookup Test

Run:

nslookup www.example.com 8.8.4.4
  • Forces the query to Google’s secondary DNS
  • Shows the resolved IP address

Common Problems and Solutions

1. DNS Not Changing

  • Ensure DNS settings are saved correctly
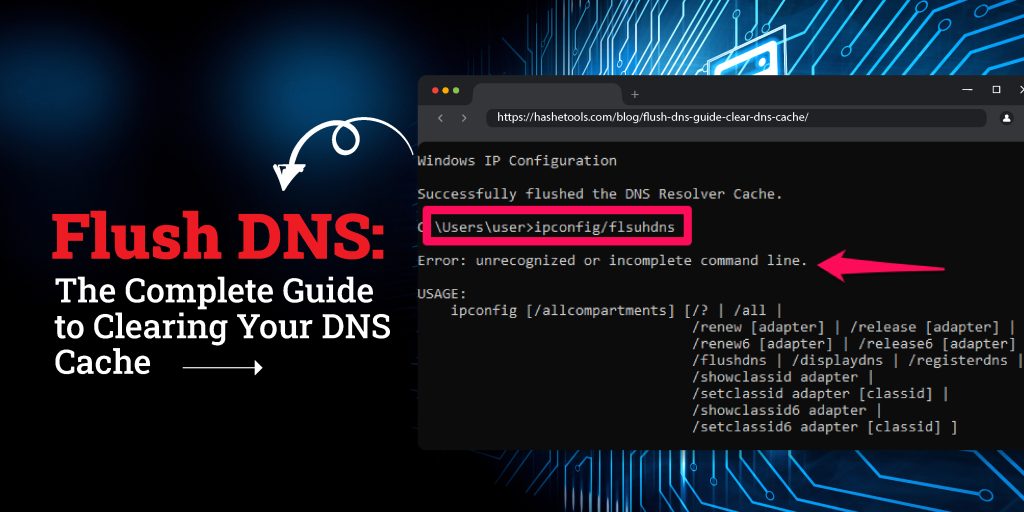
  • Flush cache: ipconfig /flushdns (Windows) or sudo dscacheutil -flushcache (Mac)

2. Slow Internet Despite Google DNS

  • Check if router or network hardware is limiting speed
  • Sometimes local ISP DNS is faster due to proximity

3. DNS Blocking

  • Some networks may block custom DNS; 8.8.4.4 may not work in such cases

Benefits of Using 8.8.4.4 Alongside 8.8.8.8

  • Continuous uptime: Secondary DNS ensures uninterrupted browsing
  • Faster query resolution: Google’s infrastructure is globally optimized
  • Better troubleshooting: Helps isolate network or DNS issues
  • Enhanced security: Protects against DNS attacks
  • Easy to remember: Simple numbers make it user-friendly

Fun Facts About 8.8.4.4

  • Google chose easy-to-remember numbers for 8.8.8.8 and 8.8.4.4
  • Millions of devices worldwide rely on these DNS servers daily
  • Using this pair ensures maximum reliability and minimal downtime

FAQs About 8.8.4.4

1. Can I use 8.8.4.4 as my primary DNS?

Yes, but it’s recommended to keep 8.8.8.8 as primary for consistency.

2. Is Google DNS secure?

Yes, it’s more secure than most ISP DNS servers and protects against cache poisoning and spoofing.

3. Will using 8.8.4.4 improve speed?

Often yes. Google DNS is faster than many ISP DNS servers, especially if local DNS is slow.

4. Is 8.8.4.4 free to use?

Absolutely. Google provides it free for personal and business use.

5. How do I know if 8.8.4.4 is working?

Run a ping test (ping 8.8.4.4) or DNS lookup (nslookup example.com 8.8.4.4) to check connectivity and query resolution.

6. Can 8.8.4.4 help in network troubleshooting?

Yes, it’s widely used to isolate network issues. If primary DNS fails but 8.8.4.4 responds, the problem is likely with the primary DNS or network device.

Conclusion

Google’s secondary public DNS, 8.8.4.4, is an essential tool for anyone seeking reliable, fast, and secure internet browsing. By pairing it with 8.8.8.8, you ensure uninterrupted DNS resolution, improved web performance, and protection against common DNS threats.

Whether you are a casual user, business owner, or network administrator, configuring 8.8.4.4 as a secondary DNS is a simple yet effective step to improve your internet reliability. Tools like HasheTools DNS Checker and Ping Test make it easy to test and verify your setup, ensuring your devices stay connected efficiently and securely.

  • Posted on November 20, 2025
  • In DNS

Flush DNS: The Complete Guide to Clearing Your DNS Cache

Flush DNS Clearing Your DNS Cache

Flushing DNS is an essential network maintenance task that ensures your device accesses the most up-to-date domain information. Outdated DNS records in your cache can lead to issues such as slow website loading, connection errors, and the inability to reach recently updated websites. This guide covers how to flush DNS on Windows, macOS, Linux, and mobile devices, provides troubleshooting tips, discusses advanced methods, and explains public DNS cache clearing. We’ll also show you how HasheTools can simplify your DNS management.

What Is Flushing DNS?

When you visit a website, your computer performs a DNS lookup to translate a domain name (like example.com) into an IP address. Your system stores this information locally in a DNS cache to speed up subsequent visits. Over time, cached entries can become outdated, causing connectivity issues. Flushing DNS clears these cached records and forces your system to fetch fresh DNS information.

Key Terms:

  • DNS Cache: Temporary storage of domain-to-IP mappings.
  • TTL (Time-to-Live): Duration a DNS record remains in cache.
  • Flush DNS / Clear DNS Cache / Reset DNS Cache: Different terms for the same process.

Why You Should Flush DNS

Flushing your DNS cache resolves several common network problems:

  1. Accessing Updated Websites: When a website changes servers or IP addresses, your cached DNS may point to the old location.
  2. Fixing Connection Errors: Outdated DNS records can cause 404 Not Found errors or failed connections.
  3. Speed & Performance: Connecting to a closer or updated server can improve load times.
  4. Security: Removing cached DNS entries helps prevent DNS spoofing or cache poisoning attacks.
  5. Network Troubleshooting: Clearing DNS is often the first step in diagnosing internet issues.

How to Flush DNS: Step-by-Step

Windows

Flushing DNS on Windows depends on your version. All commands require administrator privileges.

Windows 11 & 10

  1. Right-click the Start menu → select Windows Terminal (Admin) or Command Prompt (Admin).
  2. Type: ipconfig /flushdns
  3. Press Enter. You’ll see: “Successfully flushed the DNS Resolver Cache”
  4. Type exit to close the terminal.

Additional commands for network reset:

ipconfig /release
ipconfig /renew

Windows 8 / 8.1

  1. Press Windows + X → select Command Prompt (Admin).
  2. Run ipconfig /flushdns.

Windows 7 / Vista

  1. Start → All Programs → Accessories → Right-click Command Prompt → Run as Administrator.
  2. Run ipconfig /flushdns.

Windows XP / 2000 / NT

  1. Start → Run → type cmd.exe → Enter.
  2. Run ipconfig /flushdns.

macOS and Mac OS X

Open Terminal from Applications > Utilities and run the appropriate command for your version:

macOS Version Command
macOS 12 (Monterey), 11 (Big Sur), 10.15 (Catalina) sudo killall -HUP mDNSResponder
macOS 10.14 (Mojave) sudo killall -HUP mDNSResponder
macOS 10.13 – 10.12 (High Sierra, Sierra) sudo killall -HUP mDNSResponder
Mac OS X 10.11 (El Capitan) sudo killall -HUP mDNSResponder
Mac OS X 10.10 (Yosemite) sudo discoveryutil udnsflushcaches
Mac OS X 10.6 (Snow Leopard) sudo dscacheutil -flushcache
Mac OS X 10.5 and below sudo lookupd -flushcache

Linux

Linux DNS cache commands depend on the service used:

  • systemd-resolve (Ubuntu/Debian): sudo systemd-resolve --flush-caches
  • NSCD: sudo /etc/init.d/nscd restart
  • BIND: sudo rndc flush

Mobile Devices

  • iOS: Restart your device or toggle Airplane Mode.
  • Android: Restart your device or use network reset options.

Alternative Ways to Flush DNS

  1. Restart Your Device: Easiest method if you lack admin privileges.
  2. Reset Network Connection: Reconnect WiFi or unplug/plug Ethernet.
  3. Change DNS Server: Switching to a public DNS like Google 8.8.8.8 or Cloudflare 1.1.1.1 automatically refreshes the cache.
  4. Modify Hosts File: Temporarily force specific domain resolution.

Clearing Public DNS Resolver Cache

  • Cloudflare 1.1.1.1: Visit their Purge Cache tool → enter domain → select record type → clear.
  • Google Public DNS 8.8.8.8: Visit Google DNS Flush Cache → enter domain → flush.
  • OpenDNS: Use OpenDNS CacheCheck → enter domain → refresh cache.

Troubleshooting DNS Issues

  • Page Not Found (404): Old cache points to deleted page; flush DNS.
  • Unable to Connect: Cached IP may be wrong; flush DNS or reset network.
  • Old Website Version: Cached data shows outdated content; flush DNS to see updates.
  • Network Performance Issues: Cached DNS might point to a distant server; flushing can optimize routing.

Using HasheTools to Check and Flush DNS

HasheTools Flush DNS Tool makes clearing DNS simple:

  • No command line needed
  • Works on Windows, macOS, Linux
  • Clears local cache instantly
  • Links to DNS propagation checker and other network diagnostic tools

Other useful HasheTools DNS tools:

  • DNS Lookup
  • Reverse DNS Lookup
  • Domain Expiry Check

FAQs About Flushing DNS

Q1: Is it safe to flush DNS?
Yes. Flushing your DNS cache is safe and does not harm your system.

Q2: Does flushing DNS improve internet speed?
It doesn’t increase raw bandwidth, but it can resolve slow access due to outdated cached records.

Q3: How often should I flush DNS?
Only when you encounter connectivity issues, outdated content, or network changes.

Q4: Can I flush DNS without admin access?
Yes, by restarting your device or using the HasheTools online tool.

Q5: Why am I still seeing the old website after flushing DNS?
Your browser cache may still hold old content; clear the browser cache as well.

Pro Tips

  • Combine flush DNS with ipconfig /release and ipconfig /renew for a complete network reset.
  • Use public DNS servers for faster and more reliable resolution.
  • Keep a regular maintenance schedule for servers and DNS settings to avoid cache issues.

Conclusion

Flushing DNS is a critical step in network maintenance, troubleshooting, and ensuring up-to-date website access. With step-by-step instructions for Windows, macOS, Linux, and mobile devices, along with HasheTools online tools, you can maintain optimal DNS performance and avoid connectivity problems.

  • Posted on November 20, 2025
  • In DNS, Networking

8.8.8.8 – Google Public DNS Explained: Everything You Need to Know

8.8.8.8 Google Public DNS

The internet is all about connecting domain names to IP addresses. Every time you type a website like www.example.com, your device contacts a DNS server to find out where to send the request. One of the most famous DNS servers in the world is 8.8.8.8, offered by Google.

In this blog, we’ll explain what 8.8.8.8 is, why it’s important, how to use it, and how it can help improve your internet experience.

What is 8.8.8.8?

8.8.8.8 is a public DNS server provided by Google. DNS, or Domain Name System, is like the phonebook of the internet. It converts human-readable website names into IP addresses that computers understand.

  • DNS Function: www.example.com → 93.184.216.34
  • 8.8.8.8 Role: It is the server that performs this translation efficiently and reliably.

Google launched 8.8.8.8 in 2009 to provide a fast, secure, and free DNS service for everyone.

Why Use 8.8.8.8?

Using 8.8.8.8 comes with several benefits:

1. Faster Internet

Many ISPs’ default DNS servers are slow or overloaded. Using Google Public DNS can improve page load times and reduce latency.

2. Reliable and Always Online

Google’s DNS infrastructure is robust and globally distributed. Downtime is extremely rare, ensuring your DNS requests are always resolved.

3. Security Benefits

Google DNS helps prevent some common DNS attacks like DNS cache poisoning or hijacking, keeping your browsing safer.

4. Easy Troubleshooting

8.8.8.8 is widely used to check internet connectivity. If you can ping 8.8.8.8 but not a website, the problem is likely with your DNS or domain.

How to Use 8.8.8.8

You can configure 8.8.8.8 on:

  • Windows
  • MacOS
  • Linux
  • Routers
  • Mobile Devices

Step-by-Step Example (Windows 10/11)

  1. Open Network & Internet Settings → Change Adapter Options
  2. Right-click your connection → Properties
  3. Select IPv4 → Properties
  4. Select Use the following DNS server addresses
  5. Enter:
    • Preferred DNS: 8.8.8.8
    • Alternate DNS: 8.8.4.4 (Google secondary server)
  6. Save settings and restart your connection

Step-by-Step Example (MacOS)

  1. Go to System Preferences → Network
  2. Select your active connection → Advanced → DNS
  3. Click + and enter 8.8.8.8
  4. Click + again and enter 8.8.4.4
  5. Apply changes

8.8.8.8 vs Other DNS Servers

There are several DNS options available. Let’s compare:

DNS Server Speed Privacy Reliability Notes
8.8.8.8 (Google) Fast Moderate Excellent Widely used, free
1.1.1.1 (Cloudflare) Very Fast High Excellent Privacy-focused
9.9.9.9 (Quad9) Moderate High Very Good Security-focused
ISP DNS Variable Low Varies Often slow, unreliable

Verdict: Google DNS (8.8.8.8) is great for speed, reliability, and troubleshooting. For privacy, Cloudflare or Quad9 may be better.

Testing 8.8.8.8

You can test if 8.8.8.8 is working with simple commands:

Ping Test

Open Command Prompt / Terminal:

ping 8.8.8.8

  • If you get responses → your internet is connected.
  • If ping fails → check network or firewall settings.

DNS Lookup Test

nslookup www.example.com 8.8.8.8

  • This forces your query to Google DNS and shows the resolved IP.
  • Helps troubleshoot DNS-related issues.

Common Problems and Solutions

1. DNS Not Changing

  • Ensure you saved the new DNS settings properly.
  • Restart your computer or flush the DNS cache: ipconfig /flushdns

2. Slow Internet Despite Google DNS

  • Check if your network hardware (router/modem) is limiting speed.
  • Sometimes, the nearby ISP DNS is faster due to proximity.

3. DNS Blocking

  • Some ISPs or networks block custom DNS. In that case, 8.8.8.8 may not work.

Fun Facts About 8.8.8.8

  • It’s easy to remember, which is why Google chose it.
  • You can ping it to test connectivity even if websites are down.
  • It’s used worldwide by millions for fast and reliable DNS resolution.

FAQs About 8.8.8.8

1. Can I use 8.8.8.8 on mobile devices?

Yes. Both iOS and Android allow custom DNS settings. Enter 8.8.8.8 and 8.8.4.4 in Wi-Fi settings.

2. Is Google DNS secure?

It’s more secure than most ISP DNS servers and protects against common attacks, but Google logs some queries for analytics and optimization.

3. Can 8.8.8.8 improve speed?

Often yes. Faster than many ISP servers, especially in regions with slow default DNS.

4. Is 8.8.8.8 free?

Absolutely. Google provides it completely free for personal and business use.

5. Should I use 8.8.8.8 as my only DNS?

It’s recommended to also use the secondary server, 8.8.4.4, in case the primary fails.

Conclusion

Google Public DNS (8.8.8.8) is one of the most reliable, fast, and globally trusted DNS servers. It ensures your domain lookups happen quickly, improves reliability, protects against some DNS attacks, and helps troubleshoot network issues effectively.

By configuring 8.8.8.8 as your primary DNS, you can enjoy faster internet browsing, stable connections, and peace of mind knowing your DNS resolution is handled by one of the most robust infrastructures in the world.

Whether you’re a casual internet user, a business owner, or a network admin, 8.8.8.8 is an essential tool in your networking toolkit.

  • Posted on November 20, 2025
  • In DNS

Reverse DNS Does Not Match SMTP Banner: What This Warning Really Means

Reverse DNS Does Not Match SMTP Banner

Email deliverability depends heavily on your DNS configuration. If your mail server is even slightly misconfigured, you may run into warnings that directly affect inbox placement. One of the most common alerts seen during SMTP tests is:

“Reverse DNS does not match SMTP banner.”

This warning appears on platforms like MXToolbox, HasheTools SMTP tests, and other email diagnostics tools. Although it may look technical or confusing, the issue is simple: Your mail server is identifying itself using a hostname that does not match its reverse DNS record.

This mismatch does not always break your email service, but it can affect your sender reputation and may cause your messages to land in spam.

Let’s break it down in an easy, clear, and actionable way.

What Is Reverse DNS (rDNS)?

Reverse DNS, also called PTR record lookup, is a DNS mechanism that maps an IP address back to a hostname.

While a normal DNS (A record) converts hostname → IP,

reverse DNS converts IP → hostname.

Simple Example

  • A record: mail.example.com → 192.0.2.10
  • PTR record (rDNS): 192.0.2.10 → mail.example.com

Mail servers rely on this reverse lookup to verify the identity of the server trying to send email. If a mail server cannot verify the reverse DNS or finds mismatching information, it becomes suspicious.

This forms the basis of the warning.

What Is an SMTP Banner?

When your mail server connects to another server to send an email, it introduces itself using a greeting message called the SMTP banner.

Example SMTP banner:

220 mail.example.com ESMTP Postfix

The most important part here is the hostname:

mail.example.com

Receiving servers expect this hostname to match your reverse DNS and forward DNS.

If it does not match, the server flags it as a potential spam indicator.

Why Does the “Reverse DNS Does Not Match SMTP Banner” Warning Appear?

This warning appears when:

SMTP banner hostname ≠ PTR record hostname

Common reasons include:

1. Incorrect SMTP hostname

Your mail server might be configured with a default hostname like:

  • localhost
  • server.yourhostprovider.com
  • ip-123-45-67-89.hostingprovider.net

Instead of your actual mailing domain.

2. Wrong PTR record

The PTR record may point to:

  • an old hostname
  • your hosting provider’s hostname
  • a generic IP-based hostname

Instead of your mail server hostname.

3. Missing forward DNS

Even if the PTR is correct, if the matching A record is missing, it still triggers a warning.

4. Using an ISP mail server or shared hosting

Cloud providers like AWS, DigitalOcean, Vultr, and shared hosts often use generic reverse DNS names.

5. Misconfigured mail server during setup

During Postfix, Exim, or cPanel setup, if the SMTP banner was not updated properly.

Why Is This Mismatch a Problem?

While this warning is not always fatal, it strongly impacts:

1. Email Deliverability

Gmail, Outlook, Yahoo, and most corporate mail servers check for DNS consistency. A mismatch raises suspicion and lowers trust.

2. Spam Filtering

Spam engines score your server based on:

  • reverse DNS consistency
  • proper SMTP banner
  • matching hostname

A mismatch increases your spam score.

3. Email Reputation

Long-term sending with mismatches can reduce IP reputation, causing:

  • delays
  • soft bounces
  • junk folder placement

4. MXToolbox / HasheTools Warnings

When you test using HasheTools SMTP Test or MXToolbox, you’ll see:

“Reverse DNS does not match SMTP Banner”

This is a direct indication that your DNS identity is not aligned.

How to Check This Warning Using HasheTools or MXToolbox

You can verify the issue quickly:

Step 1: Run HasheTools SMTP Test

Go to: https://www.hashetools.com/tools/smtp-test

Enter your mail server address and run the scan.

Look for this line:

Reverse DNS does not match SMTP Banner

Step 2: Run Reverse DNS Lookup

Use HasheTools Reverse DNS Lookup: https://www.hashetools.com/tools/reverse-dns-lookup

Check if the hostname matches your SMTP banner.

Step 3: Check your forward DNS

Look for the A record pointing to your IP.

When these three don’t align, the mismatch appears.

How to Fix “Reverse DNS Does Not Match SMTP Banner”

The fix is simple:

All three must match:

A record = PTR record = SMTP banner

Follow these exact steps:

1. Fix Your SMTP Banner (HELO/EHLO)

Set the correct hostname in your mail server settings:

Example: mail.yourdomain.com

How to update:

  • Postfix → /etc/postfix/main.cf → myhostname = mail.yourdomain.com
  • Exim → cPanel → Exim Configuration → SMTP Banner
  • Plesk → Mail Settings → Outbound Mail Mode
  • Windows SMTP → Server properties → Identification

2. Fix Your PTR Record (Reverse DNS)

PTR records can only be updated by your:

  • hosting provider
  • ISP
  • VPS/cloud provider

Request them to set:

Your IP → mail.yourdomain.com

Example request: Please update the PTR record for IP 192.0.2.10 to: mail.example.com

3. Make Sure Forward DNS Exists

For the hostname: mail.yourdomain.com

Create an A record: mail → your IP

4. Match All Three Correctly

Final correct structure must be:

Component Should Be
SMTP Banner mail.yourdomain.com
A Record mail.yourdomain.com → IP
PTR Record IP → mail.yourdomain.com

If even one differs → a warning appears.

5. Test Again

Use HasheTools SMTP Test again: https://www.hashetools.com/tools/smtp-test

If all matches: Warning disappears.

Correct Example of DNS + SMTP Setup

Forward DNS (A Record): mail.example.com → 192.0.2.10

Reverse DNS (PTR Record): 192.0.2.10 → mail.example.com

SMTP Banner: 220 mail.example.com ESMTP Postfix

This is the ideal setup.

What Happens If You Ignore This Warning?

If you ignore this mismatch, your email server may:

  • land in spam (especially in Gmail & Outlook)
  • face slow delivery
  • get domain reputation issues
  • fail verification checks
  • get flagged by corporate mail filters
  • lose email trust score

For businesses and transactional emails, ignoring this warning is never recommended.

FAQs

1. Why does the “Reverse DNS does not match SMTP banner” warning appear?

This warning appears when your mail server’s hostname (SMTP banner) does not match the hostname returned by its reverse DNS (PTR record). Both must point to the same FQDN for proper authentication.

2. Does this mismatch affect email delivery?

Yes. Most spam filters, including Gmail, Outlook, and corporate mail gateways, treat DNS inconsistencies as a sign of an untrustworthy mail server. This can push emails into spam or cause delivery delays.

3. How do I fix a reverse DNS mismatch?

You must update:

  1. SMTP banner hostname
  2. A record of your mail server
  3. PTR record for your IP

All three should match the same domain name, such as mail.yourdomain.com.

4. Can I update the PTR record myself?

No. PTR records are controlled by the IP address owner, usually your hosting provider, VPS provider, or ISP. You must request that they update the reverse DNS.

5. How long do DNS and PTR updates take to propagate?

A record updates within minutes. PTR record changes may take 15 minutes to 24 hours, depending on the provider.

6. If everything else is correct, is this warning still serious?

Even if SPF, DKIM, and DMARC are perfect, a hostname mismatch still affects server trust. It won’t always block your emails, but it does reduce inbox performance, especially for bulk or transactional emails.

Conclusion

A “Reverse DNS does not match SMTP banner” warning simply means your mail server is presenting an identity that does not match the hostname returned by its reverse DNS record. While this issue doesn’t break email sending, it directly influences deliverability, trust, and your overall sender reputation. Modern mail providers rely heavily on hostname alignment to verify whether a server is genuine or potentially harmful.

By ensuring your SMTP banner, A record, and PTR record all match the same hostname, you create a clean and trustworthy DNS configuration. This small fix helps your emails reach inboxes faster, reduces spam flags, and strengthens your server’s credibility.

Tools like HasheTools SMTP Test and DNS utilities make it easy to detect and resolve these issues quickly, ensuring your mail server stays optimized and reliable at all times.

Recent Posts
Google.com IP Address
DNS

Google.com IP Address: Find Google Server IPs (IPv4 & IPv6)

January 30, 2026
DNS Records for Google.com
DNS

DNS Records for Google.com: Complete Guide (NSLookup & DNS Lookup)

January 30, 2026
Reverse IP Lookup
Featured

Reverse IP Lookup: Find Domains Hosted on an IP Address Easily

January 29, 2026
Website to IP Lookup
DNS

Website to IP Lookup: How to Find IP Address of Any Website

January 26, 2026
Blog Categories
Blog Archives
Archives
DNS Tools
  • All Records
  • DNS Lookup
  • DNS Reverse
  • DNS Servers
  • MTA-STS
Domain Tools
  • ARIN Lookup
  • ASN Lookup
Email Tools
  • BIMI Lookup
  • Blacklist Check
  • DKIM Lookup
  • DMARC Lookup
  • Email Deliverability
Network Tools
  • IP Lookup
  • Ping Test
  • TCP Lookup
Registrar Tools
  • Domain Expiry Check
  • Domain Health
  • Domain Info
  • Domain Lookup
  • WHOIS
SMTP Tools
  • Service Lookup
  • SMTP Test
Web Tools
  • HTTP Lookup
  • HTTPS Lookup
  • My IP address
Your IP is: 51.161.15.69
  • About
  • Contact
  • Terms & Conditions
  • Privacy Policy
  • Cookie Policy
  • Terms of Use
  • Refund Policy

© Copyright 2025, HasheTools, All rights reserved. | A Product of Hashe Computer Solutions (Pvt) Ltd.

HT-Logo
  • DNS
    • All Records
    • DNS Lookup
    • DNS Reverse
    • DNS Servers
    • MTA-STS
  • Domain
    • ARIN Lookup
    • ASN Lookup
  • Email
    • BIMI Lookup
    • Blacklist Check
    • DKIM Lookup
    • DMARC Lookup
    • Email Deliverability
  • Network
    • IP Lookup
    • Ping Test
    • TCP Lookup
  • Registrar
    • Domain Expiry Check
    • Domain Health
    • Domain Info
    • Domain Lookup
    • WHOIS
  • SMTP
    • Service Lookup
    • SMTP Test
  • Web
    • HTTP Lookup
    • HTTPS Lookup
    • My IP address
  • All Tools
  • Pricing
  • Contact
Login